Tried these in mseal..you can use air dry clay or polymer clay or paper mash to make them.
Craft collages
Here is the second part of the crafts tried by kids between 28th March to 5th April.
For First part of collages click here : Part 1
Link to make these with step by step instructions : DIY Kids crafts
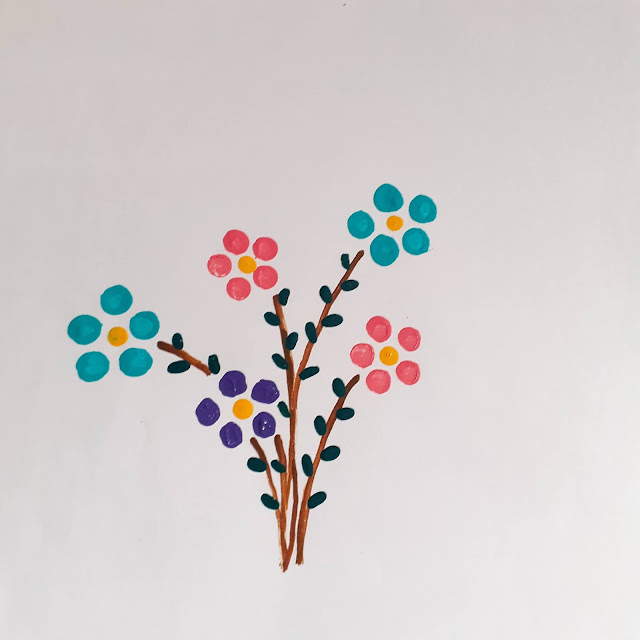
Painting with earbuds
Try this simple technique of painting using earbuds for greeting cards or even fabric painting. I tried this simplest pattern..you can try more complicated patterns like trees with fruits also.
 |
Materials required
Paper/ fabric
Earbuds- one side for each colour
Brushes for outlines
Paint -poster for paper and acrylic for fabric
DIY Agamograph - Craft 15
Materials required
A-4 size sheets- 2
Pencil
Any Colours- Sketchpens, crayons, colour pencils or water colours
Brush (in case of water colours)
Scissors
Glue
Now paint each of them with different background colours. Like Day and night or any 2 different design with different colour combinations.
Fold the painted sheets in 4,6 or 8 parts. On the backside mark as A1, A2 etc depending on number of pieces for one painting and B1, B2 etc for second painting. Both of them should have equal pieces. I divided into 6 pieces each. So my pieces are A1, A2, A3, A4, A5, A6 and for the second painting B1, B2, B3, B4, B5 and B6. Use same direction for folding these 2 parts and the big sheet also..else it will not match and you cannot complete this craft.
Cut them into strips.
In the second A 4 sheet which is plain as of now, we should make folds (total of A + B) like fan..One fold up, one fold down. My total was 6 +6 =12...so the sheet will have 12 equal folds. Write A and B alternatively in the folds.
Place the A pieces now to arrange the design in proper order. Start sticking them on alternate folds wherever there is A. Similarly arrange the B pieces in proper order and stick them in the B places marked in the paper folds.
Let it dry for 5 minutes. Your Agamograph is ready..Front view and 2 side views of finished Agamograph. Check the video at the start to use it. Have fun.
DIY Simple Zentangle - Craft 14
Zentangle art requires some patience. To make it simple for kids to finish, I suggest using just half of an A4 size paper. Also let the alphabet or word be in bigger font to cover atleast 60-70% of the page used. This will help in finishing the art faster without losing patience and leaving it midway.
Materials required
Paper
Scale
Pencil
Pointed pen in any colour.
Draw 1 cm or 2 cm outline in all sides of the sheet. Use a pencil to draw an alphabet ( First alphabet of your name) or a nickname that would fit in the sheet. Once satisfied that it looks neat, use the pen to draw a thick outline for that. Erase any pencil marks if visible.
Start drawing these design in little areas of the empty space. You can easily fit in minimum 6 different designs. If you have patience, you can try more patterns. A video is also attached..hope it helps.
Video link
DIY Flower vase - Craft 13
Anushya (12 yrs) tried this flower vase from a waste juice bottle using simple things available at home.
Materials required
Any old/waste water/ juice bottle
Glue
Scissors
Blade/Cutter for cutting the bottle
Glitter tubes, stickers, satin ribbons and any decorative material
Mark a round a little below the neck of the bottle. Now, we have to cut this- TO BE DONE BY PARENTS ONLY . Cut it with a blade/cutter neatly on the marked round.
Start decorating it using glitter tubes, satin ribbons, stickers or any decorative material which you have at home.
Your flower vase from waste materials is ready.
DIY Mandala Art - Craft 12
Mandalas are a very colourful and satisfying art form. I tried it for the first time too..
Materials required
Any plain paper
Pencil
Compass to draw circles - I used box lids of different sizes.
Sketchpens or pencil colours or crayons or water colours- Your choice
Sharp pointed pen.
If you are using a compass, just draw circles of different sizes to cover the sheet. But since everyone maynot have it or not know how to use it, I am sharing pics of how I did using different lids like small paint bottle, medicine bottle cover, small and medium steel box lids.

When we use compass, you can start with smallest circle or biggest one- whichever you like.
When using lids, it is ideal to start from biggest to get the other circles at even distance between each other.
So, this is the biggest circle which I drew first. Then I kept the second biggest inside that circle and ensured there is even space on all sides.
Similarly repeat for the rest. You can draw any number of circle. No restrictions on the gaps between circles too.


I suggest that using a pencil and scale, draw lines to divide the circles into 6 or 8 or 12 or 16 equal parts depending on size of the circles drawn. Then it would be easier to get even shapes all over the circle.
Now, you can draw the designs between the lines. Use a pencil to draw these lines so that you can erase them later after you finish drawing.

Colour them in vibrant colours..preferably one or two colours per circle will make the design look good.

Lastly use a sharp point pen to draw strokes inside the coloured patterns.

Subscribe to:
Comments (Atom)


