Radha Krishna Dolls


Materials Required

Rubber dolls
Various colour cloth
Laces
Wool of various colours
Golden colour paper
Old refill
Gold beads
Poster Colour

Make a ghagra choli for one doll and dhoti for another and decorate it with laces. Use black wool to make hair. Make necklaces from gold beads. Use wool to make garlands with crochet.

Use golden paper to make a crown. Cover an old refill with wool to make flute. Paint bindi and lips with poster colours.

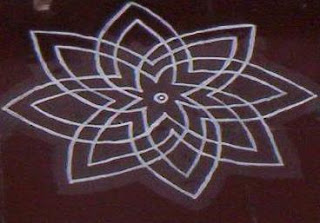
Rangoli Designs


1 row of 6 dots
1 row of 8 dots
6 rows of 10 dots
1 row of 8 dots
1 row of 6 dots


1 row of 6 dots
1 row of 8 dots
6 rows of 10 dots
1 row of 8 dots
1 row of 6 dots

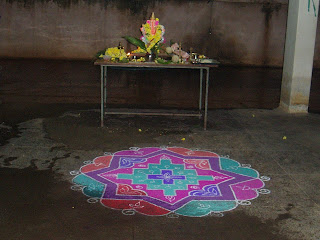
Rangoli designs


1 row of 4 dots
1 row of 6 dots
1 row of 8 dots
4 rows of 10 dots
1 row of 8 dots
1 row of 6 dots
1 row of 4 dots


1 row of 4 dots
1 row of 6 dots
1 row of 8 dots
4 rows of 10 dots
1 row of 8 dots
1 row of 6 dots
1 row of 4 dots


Mirror Decoration


Materials Required

A mirror
Mseal
Poster Colours
Talcum powder

Mix both the parts of mseal well and make small balls. Arrange the balls to form a grapes bunch. Use talcum powder to prevent the mseal from sticking in hands. Make a thin strip of the mseal and place it like a branch. Make leaves and stick them at the appropriate place.

Allow it to dry for 2 hours. Now colour it using poster colours.

Affiliate of Ideas money, Inspirations for life, Easy indian food, Earn a Crore, Time Pass

Baby Sweater -Crochet


Design taken from here...

crochet doiles, crochet patterns free, free crochet designs, crochet patterns, crochet stitches, crochet toys, crochet flowers, crochet hat, crochet sweater set, crochet socks for kids, crochet cap patterns, crochet hooks, sweater patterns, crocheted doilies, croshay patterns, crochet pattern, learn to crochet, crochet knitting patterns, filet corchet, free crochet sweater design, crochet baby sweater, filet crochet pattern, sweater cap, simple crochet pattern, crochet for beginners, crochet crafts, crochet dress, how to crochet, free crochet knitting pattern, crochet for dummies, crochet socks, decorative crochet, crochet baby dress pattern, crochet clothes, crochet toys for kids, free crochet toys design, crocheted toys for babies pattern, free patterns

Heart Shaped Box


Materials Required

Cardboard
Colour Gift wrapping sheets
Glue
Satin Ribbons
Cellotape

Cut 2 heart shape pieces in the cardboard. Cut a long strip of 2 inches width in the carboard and one more long strip of 1/2 inch.

Stick the 2" width piece to one heart shape piece and the 1/2" width piece to the other using cellotape. The one with 2" width piece will form the base and the other would be the top lid.

Cover both of them with colourful gift wrapping sheets and decorate using your creativity.

Guruvayoorappan Sriveli (Kerala Elephants)


Materials Required

Velvet Cloth
Gold Beads
Glue
Cardboard
Wool -various colours
Gold lace
Wooden elephants
Photo of some god
Hanging lace
Paper

Cut one piece of velvet cloth in 'U' Shape for the front portion to cover the trunk. Cut another piece for the side cloth. Measurements vary with the size of the elephant.

To the side portion, stitch golden lace in all four sides and attach hanging lace to the two sides. Stick golden beads throughout the 'U' shaped piece and stick small pieces of wool to the back side of the cloth. Also tie together around 10 small bits of wool and stick it to the center of the 'U' shape.

Stick the 'U' shaped cloth first on the elephant and then the side piece. Allow it to dry well. Make two more such pieces.
You can use other colour velvet cloth too.

For the center elephant carrying the god, cut a square piece in cardboard and velvet cloth. Stick the velvet to the cardboard and stick the photo of god on it.

Roll some paper and cover it with golden lace (as in the umbrella). Cut a semicircle piece in velvet and stick the corner to form a cone. Now trim the edges to get a umbrella like shape. Decorate with lace and attach the rolled paper to it. Stitch the same to the back cloth of the elephant firmly.

Sriveli is ready. This is how the elephants in Kerala are decorated in temples during the procession of God and during festivals.

Rangoli Designs


Ganesha in Vermicelli


Affiliate of Ideas money, Inspirations for life, Easy indian food, Earn a Crore, Time Pass

1st Birthday


Posting my favourite painting again to celebrate the completion of one year of blogging on my crafts blog...Thanks to all of you who visited my blog, appreciated my work and encouraged me to come up with new ideas and crafts.
Happy viewing

Decorative Piece with Matchsticks


Materials Required

1 box of unused matchsticks (can use red ones also)
Glue
Poster Colours
Chart Paper
Sequeins, chamki and any other decorative materials

Cut the chart paper into required shape. Draw a design like star and stick matchsticks to it by cutting it to the required length.

Use poster colours, sequeins, chamki or any other decorative material to fill in the gap.

It serves as a good gift item and can be used as a wall hanging too.

Affiliate of Ideas money, Inspirations for life, Easy indian food, Earn a Crore, Time Pass

Celebrations-100th Post


This is my 100th post on easycrafts...was thinking for a long time as to what it should be and finally decided to make this Radha-Krishna to thank god for his grace.


A Big Thankyou to all viewers for all the appreciation and frequent visits to the blog that encouraged me to bring more and more easycraft articles for you.


The picture of Radha - Krishna is embossed painting on Black felt cloth using pearl colours.


Transparent Zardosi Rangoli


Materials Required

Zardosi -Various Colours
Stones-various colours and shapes
Fevibond glue
A design for rangoli
A thick transparent plastic sheet

Place the plastic sheet on the rangoli design and use cellotape to stick the corners so that it doesnt move.

Start sticking the zardosi on the design using fevibond glue. Use your creativity and imagination and decorate it with stones.

Allow it to dry for some time.

Now remove the design sheet attached the plastic paper.

Your transparent rangoli is ready.

You can keep it anywhere you like. Just dusting is enough to keep it as it is.

Pen Stand from old Newspapers


Materials Required


Old newspaper
Some old cardboard box
Water Colours
Glue

First cut a page of the old newspaper into 8 equal pieces. Do Similarly for atleast 5 more sheets.

Roll out each piece and glue in the end to form a pipe. Now cut the old cardboard box into the shape as in the picture. Start sticking each pipe to the cardboard box closely. Let it dry.

Paint with water colours. This is the just the basic pen stand. You can decorate it further with either multiple colours or some laces or any other decorative material.

Affiliate of Ideas money, Inspirations for life, Easy indian food, Earn a Crore, Time Pass

Foil Work- Embossing


Materials Required

Aluminium foil
A design
Embossing Tools
Anti-rust oil
Some Kerosene
Cotton
Ball point pen
Yellow Carbon sheet
A bedsheet or cotton saree

Trace the design on the aluminium foil using yellow carbon paper in the wrong side of the foil. Mark the outline again using pen so as to be visible on the reverse side(right side) also.

Using embossing tools, emboss the entire design. Finally apply a coat of anti-rust oil mixed with little kerosene using a cotton to the design. Add some more kerosene to give it a lighter shade for the background.

Get it framed without mirror
.

Affiliate of Ideas money, Inspirations for life, Easy indian food, Earn a Crore, Time Pass

Learn the A-Z of Paper Quilling

Paper Quilling is a very interesting craft work and is increasingly popular. It requires very less materials and once the basics are known, there is no limit to creativity in paper quilling.

To start with, you will require paper quilling sheets, quilling tool and glue. Paper quilling sheets are not that easily available in India…so you can settle with some glossy kind of sheet that is neither too thin so as to tear nor too thick.

For the quilling tool, a thin crochet needle or a fat sewing needle would be a good substitute.

You can make a design in colour sheet on a white background or vice versa.

Cut the sheet into 1/8” width strips (you need not do this if you have quilling sheets as they are available readily cut).

Basic Roll-Loose and Tight
Starting with a basic roll, hold the needle or quilling pin in the right hand and using the thumb and index finger of left hand, press an the strip around the pin to the required size. Slowly move away the pin once you are done and leave the roll to open up a bit. Later, glue the end well. This is if you want to make it a loose roll. For a tight basic roll, glue the end immediately after removing the pin.


Teardrop
Make a loose roll and glue it. Leave it for a minute to dry and then pinch one side as in the picture.


Marquise

Make a loose roll and glue it. After it dries, pinch opposite sides.


“S” Scroll

Roll one end of the strip towards center. Turn and roll the other end also towards center.


Heart

Fold the quilling strip in half. Roll each end towards center.


‘V’ Scroll

Fold the quilling strip in half. Roll each end towards outside.


‘ C ’ Scroll
Mark the center of the quilling sheet using a pencil. Don’t fold. Roll both the ends to the center.


Eccentric Coil-

First make a loose basic roll. After sticking the end of the coil, let it dry. Now, apply glue in the other ring and using the needle, push the other inner rings to the point. Keep applying glue to each ring at the same place till the last but one and stick the inner ring.


Diamond

Make a loose basic roll. Like in marquise, pinch two opposite ends. Also pinch the other opposite ends to shape it as a diamond.


Square

Make a loose basic roll and pinch opposite sides to make a square pattern.


Triangle

Make a loose basic roll and instead of pinching four sides for a square, punch just three angles to make a triangle. Ensure that the sides are equal.


Leaf
Make a loose basic roll. Pinch it get a ‘s’ like design for making a leaf.


Petal Shape
Make a teardrop and bend it lightly so as to look like a petal.


Oval
After making a loose basic roll, just shape the same to give it an oval appearance. Ensure that there are no folds.


Half Moon
Make a loose basic roll and apply force to one side with the help of the needle and press the two ends to get the half moon shape.


Once you are good at these, you can proceed to make your first paper quilling project.

You can make flowers, small ducks, birds, fishes, bees and just anything using your imagination and creativity.

But the best would be to start with a simple one. Once the design is decided, arrive at the number of pieces you require for it and make them first.

Finally assemble them in a contrast colour paper by gluing them to it.

It’s a simple process once you are familiar with the shapes.

Apart from making wall hangings of it, you can even stick simple and small designs on photo frames, gift envelopes and make greeting cards too.
Happy Quilling.
Basic Scroll

For this, you should not glue up the end of the basic roll until you stick it on the design. It is left open, instead of being curled up and glued.

Paper Quilling Designs


Check out these very interesting, creative and amazing paper quilling work done by parimala and Chandni....its among the best in paper quilling till date that we have seen. Thanks for contributing to easycrafts...its a very nice gesture of sharing your skills among the craft lovers.


Affiliate of Ideas money, Inspirations for life, Easy indian food, Earn a Crore, Time Pass

Video tour

Google
Web easycrafts.blogspot.com
Related Posts Plugin for WordPress, Blogger...